テキスト読んじゃうよ!
この記事は2021年12月27日の情報です。
環境:
Windows10 Home
Python3.10
discord.py 1.7.3
https://voicevox.hiroshiba.jp/
上記のサイトからVOICEVOXをダウンロードします。
今回ダウンロードしたのはVOICEVOX.Web.Setup.0.9.3.exeでした。
ダブルクリックで起動してインストールします。
インストールが終わると
C:\Users\[user名]\AppData\Local\Programs\VOICEVOX
にrun.exeがあるのでそれを起動します。
上記のURLをブラウザのアドレスバーに貼り付けるとドキュメントが見れます。
Python3.10はインストール済みの前提で話を進めます。
コマンドプロンプトで
pip install discord.py[voice]
pip install requests
この2つをpipでインストールします。
https://www.gyan.dev/ffmpeg/builds/ffmpeg-release-essentials.zip
上記のURLからffmpegをダウンロードします。
解凍して以下のディレクトリと同じになるように配置します。
C:/ffmpeg-4.4.1-essentials_build/bin/ffmpeg.exe
https://discord.com/developers/applications
上記のサイトを開きます。
(ログインしていない場合はログインしてからURLを開き直します)
右上のNew Applicationのボタンを押します。
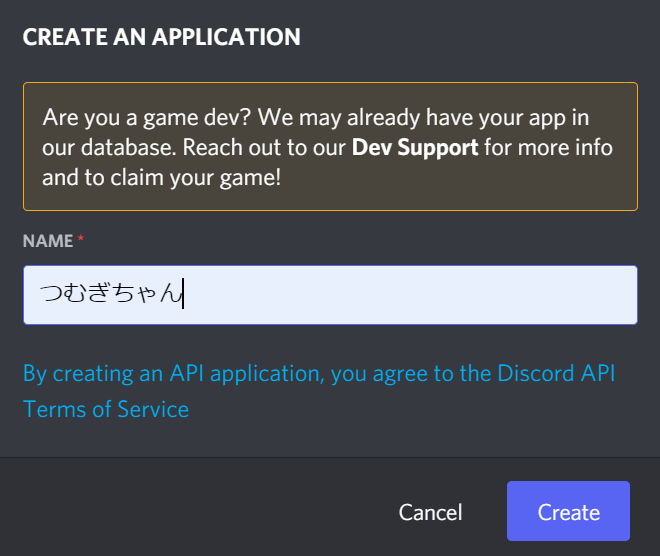
ここではつむぎちゃんにしておきました。
左のタブからBotを開き、Add Botのボタンを押してYes,do it!を押します。
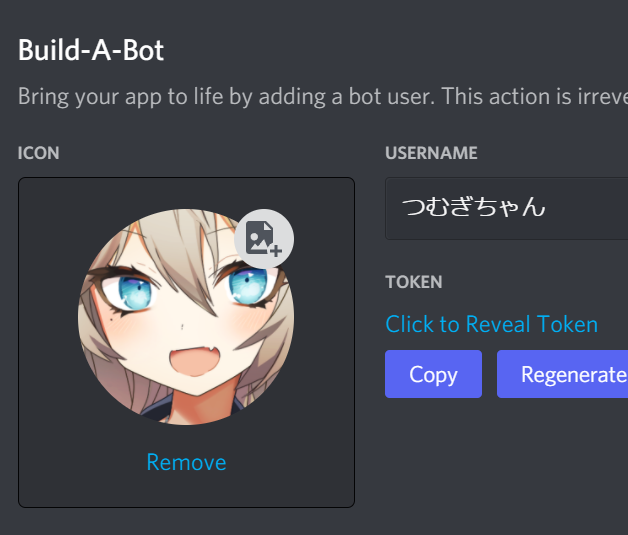
そのページをそのまま下にスクロールして

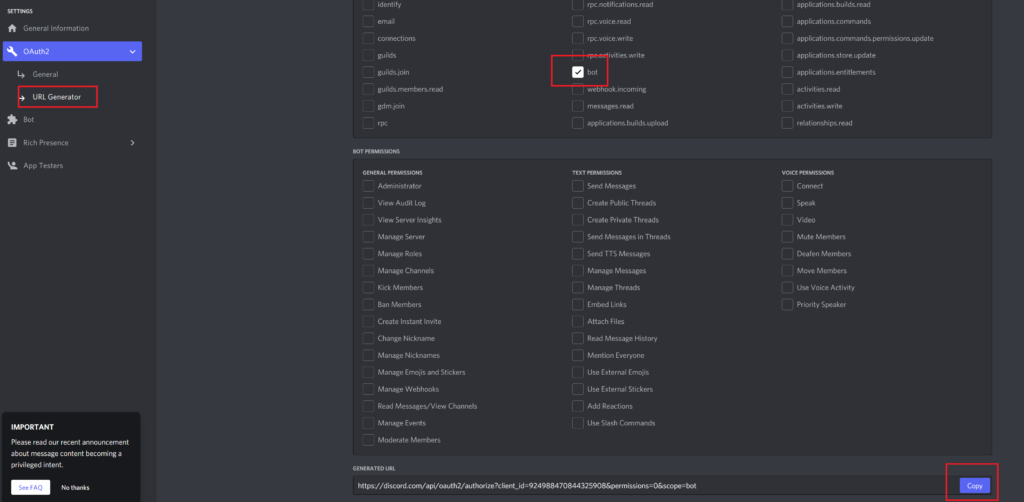
BOTにチェックを入れて右下のCopyボタンを押します。
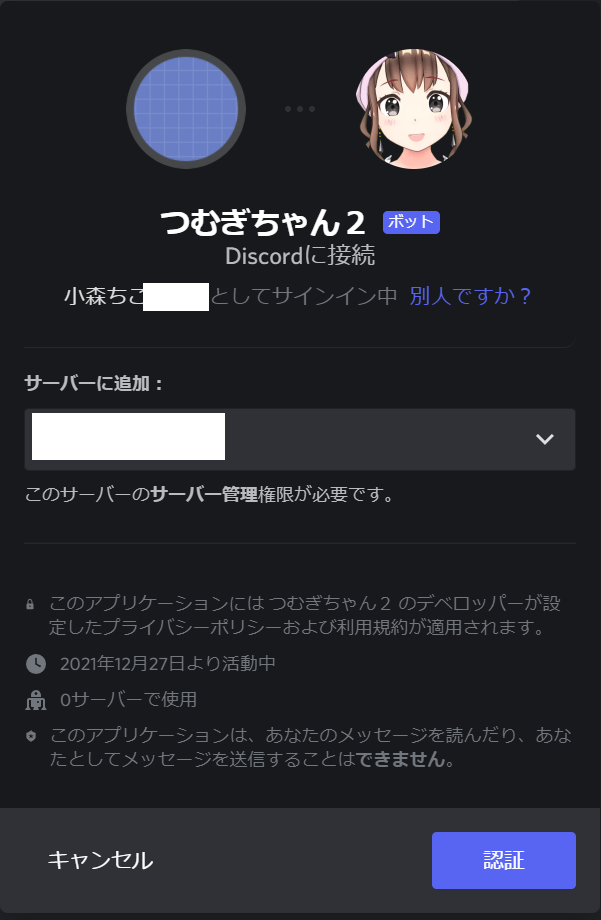
import discord
import json
import requests
import wave

class VoicevoxConnect():
    async def generate_wav_file(self, text, speaker, filepath):
        audio_query = requests.post(f'http://127.0.0.1:50021/audio_query?text={text}&speaker={speaker}')
        headers = {'Content-Type': 'application/json',}
        synthesis = requests.post(
            f'http://127.0.0.1:50021/synthesis?speaker={speaker}',
            headers=headers,
            data=json.dumps(audio_query.json())
        )
        wf = wave.open(filepath, 'wb')
        wf.setnchannels(1)
        wf.setsampwidth(2)
        wf.setframerate(24000)
        wf.writeframes(synthesis.content)
        wf.close()

class MyClient(discord.Client):
    voicevoxConnect = None
    async def on_ready(self):
        global voicevoxConnect
        print(f'{self.user}がログインしました。')
        voicevoxConnect = VoicevoxConnect()

    async def on_message(self, message):
        global voicevoxConnect
        if message.author.bot:
            return
        if message.content == 'つむぎちゃんおいで':
            if message.author.voice is None:
                await message.channel.send('ボイスチャンネルに入ってから呼んでね!')
            else:
                await message.author.voice.channel.connect()
                await message.channel.send("はーい、ボイスチャンネル入るね")
            return

        if message.content == 'つむぎちゃんばいばい':
            if message.guild.voice_client is None:
                await message.channel.send("ボイスチャンネル入ってないよ?")
                return
            else:
                await message.guild.voice_client.disconnect()
                await message.channel.send("ボイスチャンネル抜けるねー!")

        if message.guild.voice_client is None:
            return
        else:
            # speakerについては以下参照
            # http://127.0.0.1:50021/speakers
            speaker = 8 # 8は春日部つむぎのノーマル
            filepath = './audio.wav'
            await voicevoxConnect.generate_wav_file(message.content, speaker, filepath)
            if (message.guild.voice_client.is_playing()):
                return
            message.guild.voice_client.play(discord.FFmpegPCMAudio(executable="C:/ffmpeg-4.4.1-essentials_build/bin/ffmpeg.exe", source=filepath))

client = MyClient()
client.run('token')
お好きなテキストエディタに上記のコードを貼り付けます。
何もない人はWindowsのメモ帳を使いましょう。
コードの一番下の行のtokenのところを置き換えます。
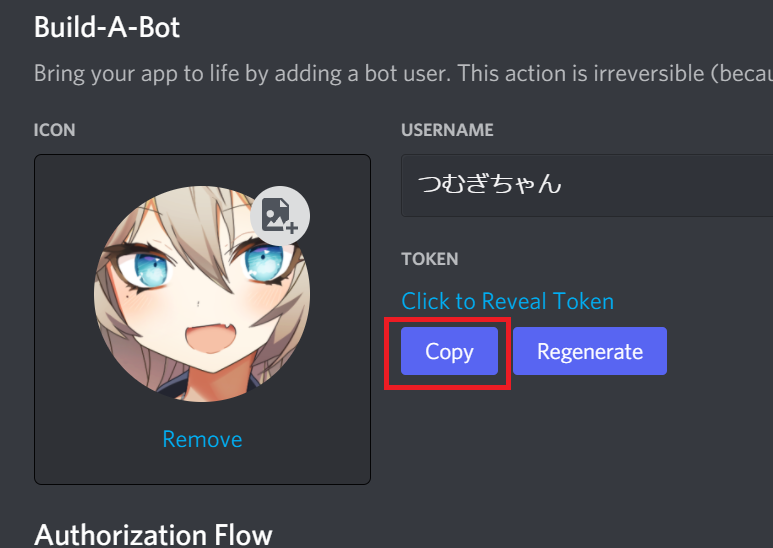
これをコードのtokenを消して貼り付けてください。
コードを書いたテキストファイルを保存します。
C:\Users\[user名]\tumugi.py
今回はここに保存しました。
コマンドプロンプトを開きます。
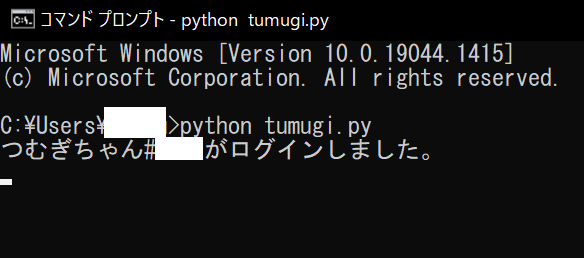
でBOTを起動します。

と言うとボイスチャンネルに入ってきます。
これで一応完成ですーおつかれさまでした!
「つむぎちゃんばいばい」と打つとボイスチャンネルから抜けるようになっています。
分かる人はソースコードいろいろいじって遊んでみてください。
以上です!またねー
クレジット表記:
VOICEVOX:春日部つむぎ
1件のコメント